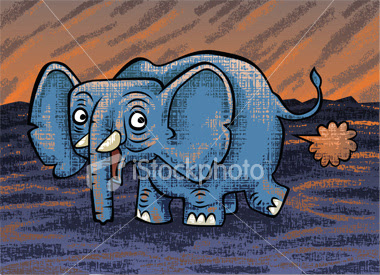
I'd like to share the technique I used for the texture in this image.
Tools used: Illustrator CS2, Artrage 2 and a Wacom tablet.
First I exported my Adobe Illustrator artwork to a jpg file. Around 100 dpi is good. Then I "Imported Image" into a wonderful little program called
Artrage 2. It looked a little sumpthin' like this:
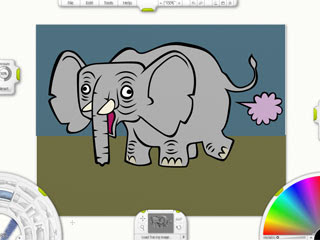
For this tutorial I use the layers feature available only in the full version of
Artrage 2. The full version costs a whopping $20. That's right. $20. Did I mention that that's payable with your Paypal funds people?
At the end of the tutorial I'll show you how to get exactly the same results with
Free Artrage 2.
OK, so, layers. Take a look at this:
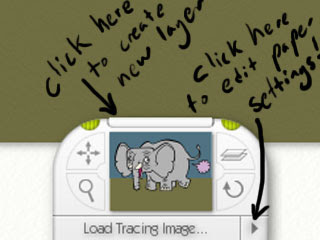
That right, just click there to create a new layer, and then click there to edit the paper settings for your new layer. Choose a 50% grey colour for the paper, give it a nice rough texture and set the opacity to 0%. In the next picture the opacity is set to 100%, but you get the idea.

Now for the fun bit. I have used the charcoal tool (great for bringing out the texture of the paper) to draw the highlights and the shadows using only pure white and pure black.
.jpg)
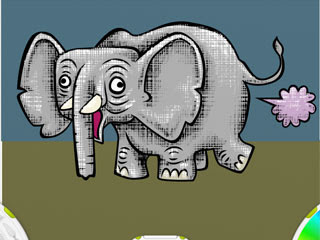
When I'm done I set the paper opacity to 100% and export as image. At this point it looks something like this:
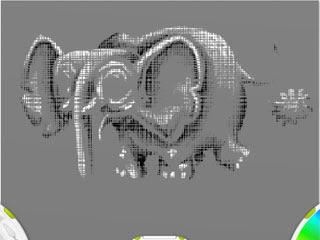
Alright, now your done with artrage and it's back to Illustrator CS2. Place your newly created texture image, and make a copy of it. Select the copy and hit the Live Trace button. You will notice in the trace settings something called the threshold.
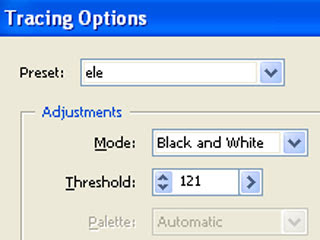
If you lower the threshold slightly below halfway, the 50% grey background of your image will read as white, leaving behind only your black shading. At this point I Expand the Live Trace and use the Magic Wand to select and then delete all of the unwanted white areas.
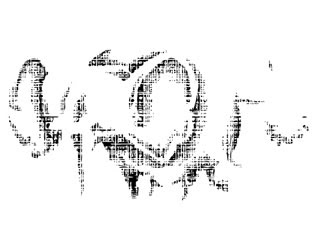
Now repeat with the other copy of the image. this time raise the threshold slightly above halfway, the 50% grey background of your image will read as black, leaving behind only your white highlights. At this point I Expand the Live Trace and use the Magic Wand to select and then delete all of the unwanted white areas. (lock your shadows up in another layer so that you don't accidentally delete them too!)
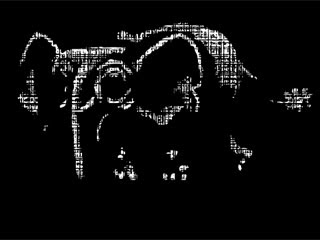
Well that's the basic technique. Many thanks to
Russell Tate for the original Texture Article over at
istockphoto.com. You may notice that his technique involves a scanner, a printer and a real live pencil and paper(!)
If you're not ready to commit to the $20 purchase of Artrage just yet, heres how to achieve these results with the free version.
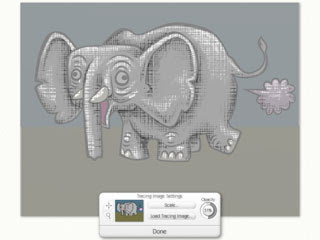
There are no layers in the free version but you can still load your background as a "Tracing Image"
It looks like the above image while you work on it but it will Export To Image with the plain neutral grey background (which I showed you how to set earlier in this tutorial.)
Now go download
Artrage and have some fun folks!


.jpg)


